
Configuring the SP100 LS Electric Drive for Different Voltage Inputs
When installing and configuring an SP100 LS Electric Drive, it is crucial to ensure the drive is set up correctly for the incoming voltage. This article will guide you through the wiring and terminal block (TB) setup for both 230-240V and lower voltage scenarios.
Factory Wiring for 230-240V
In the default configuration for 230-240V operation:
- The wire labeled T/B2-240 is in the 240V terminal.
- The jumper is set to the A-240 position.
This setup is designed to match standard 230-240V supply conditions, ensuring that the drive operates within its optimal parameters. This is how the drive is initially set up from the factory. 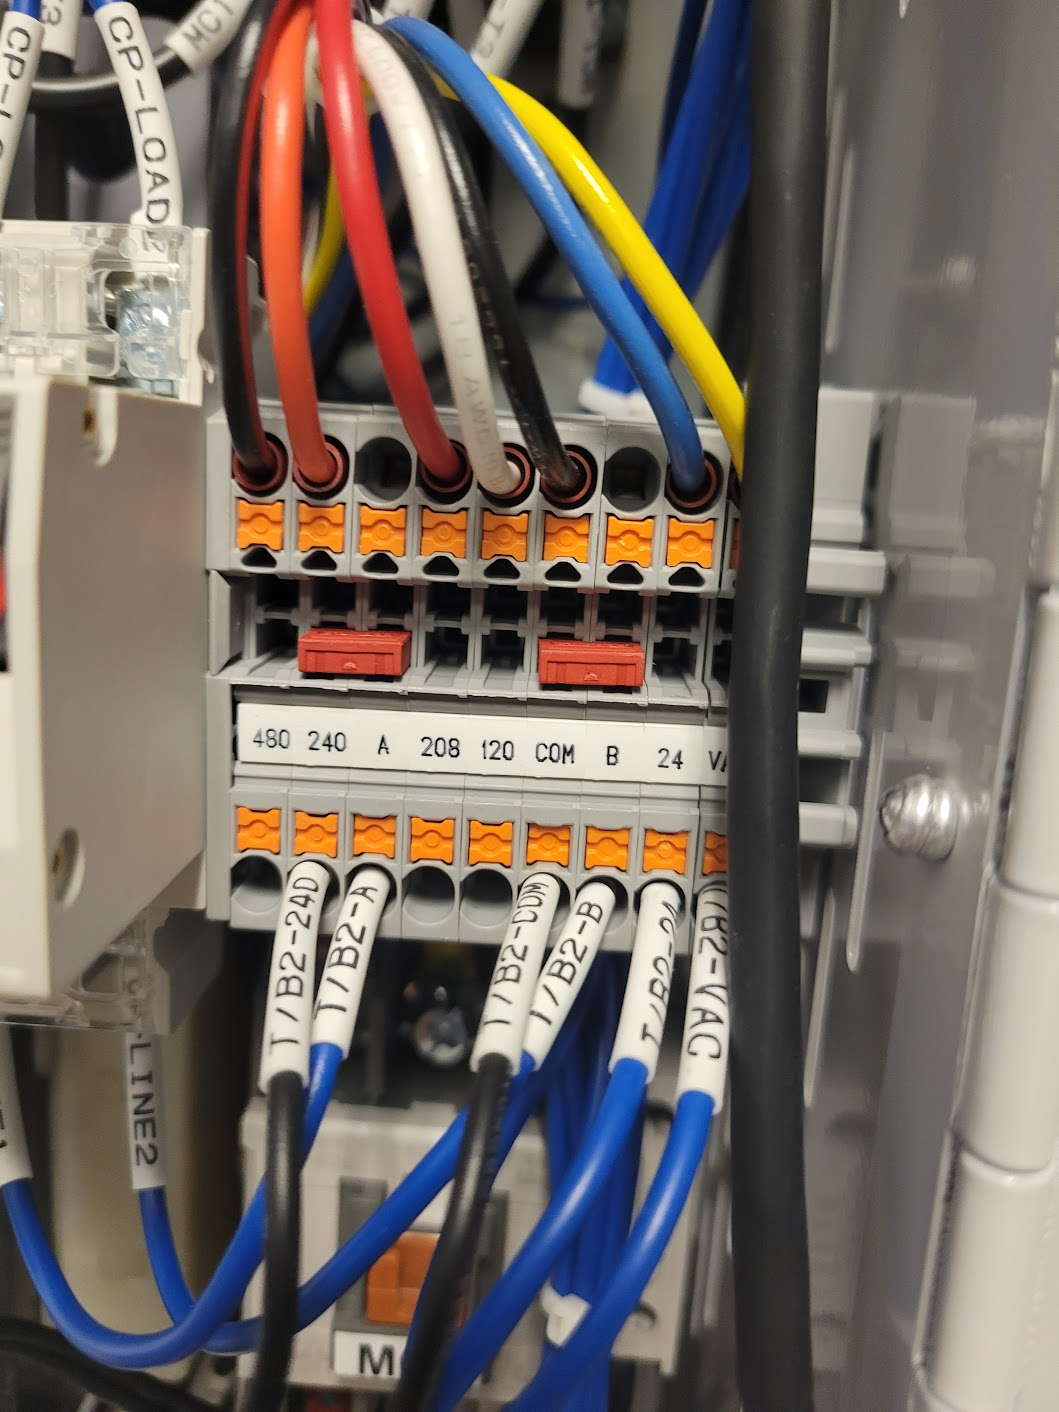
Recommended Configuration for Lower Voltages (Below 230V)
When the incoming voltage is below 230V, adjustments to the terminal block are necessary to maintain proper operation:
- Move the wire labeled T/B2-240 from the 240V terminal to the 208V terminal.
- Shift the jumper so that it jumps 208 and A instead of 240 and A.
This reconfiguration ensures proper voltage to the contactor coils. The SP100 has 24V AC coils, and by making these changes, the AC voltage is increased when the incoming voltage is lower. 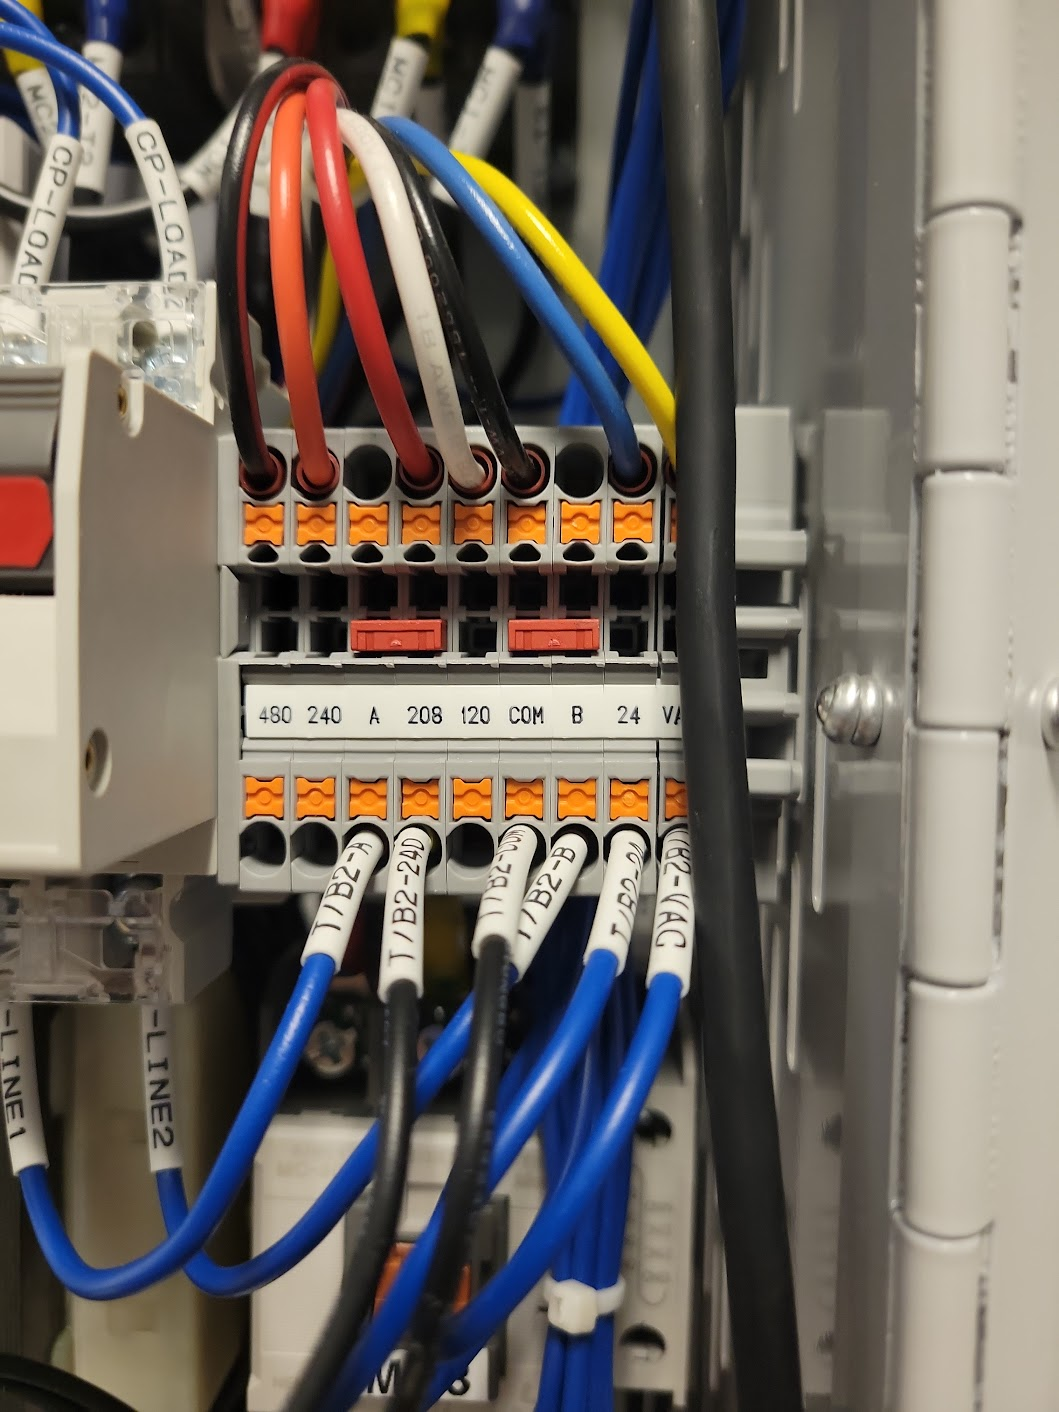
Why Is This Step Essential?
The SP100 LS Electric Drive relies on the correct voltage input to maintain its efficiency and performance. Without proper configuration:
- There could be a risk of damage to internal components due to incorrect voltage levels.
- Contactor coils may not receive the proper voltage, leading to control issues.
Final Check
Before powering on the drive:
- Double-check all wire connections to ensure they are secure.
- Verify the jumper is in the correct position.
- Use a multimeter to confirm the incoming voltage.